Showing posts with label home decor. Show all posts

Friday, June 24, 2011

Swedish Falu Rödfärg Red Paint in SW France!

When Sweden comes to mind, what do you think of? Yes, I know what you are going to say - ABBA or IKEA, but I would like to introduce you to FALU RÖDFÄRG, Sweden's beautiful natural red paint!

In the Swedish countryside, many of the wooden houses are painted in this glorious intense red that seems to 'glow' in the evening sunshine. The pigment to make the paint is found in the copper mine of Falun, Sweden, giving it a unique composition which includes iron ochre, silicon dioxide, copper and zinc which help to preserve and protect wood and gives the distinctive natural color of Falu Rödfärg paint.

I had a few outdoor projects here at our house in SW France that I thought were ideal for this paint. It is a natural water based paint and best on rough, unplanned timber, but it does work on smoother wood too. I decided to do two coats, the first being diluted about 10% and use a wide flat brush to apply the paint.


Painting the Court Yard Doors Red!


Glowing Swedish Red in SW France
Well, our new court yard is coming on a treat - the enclosed dry stone wall is finished and Martin even made some wooden doors to make a completely private little hot spot. So, after all his hard work (yes, he did build the wall himself - stone by agonizing stone!),  it was time to think of a color to compliment the stone and plants that surround the doors and also protect the wood from the elements. I'd wanted to try the Falu Rödfärg Red paint for some time and I thought the doors would be a good place to start.

This is how it comes, or you can buy the pigment and mix your own.


First Coat - diluted 10%


Finished and I even painted the sun chair!
A little glimpse of Martin's Dry Stone Wall

I did the two coats over a couple of days, but with smaller projects you could easily finish in a day, as the paint is dry after one hour, so plenty of time to apply the second coat.

If you want more information on Falu Rödfärg Swedish Red Paint - here is the main website where you will find where to buy the paint in your country and lots of other interesting facts about this gorgeous glowing red paint!


Wednesday, June 8, 2011

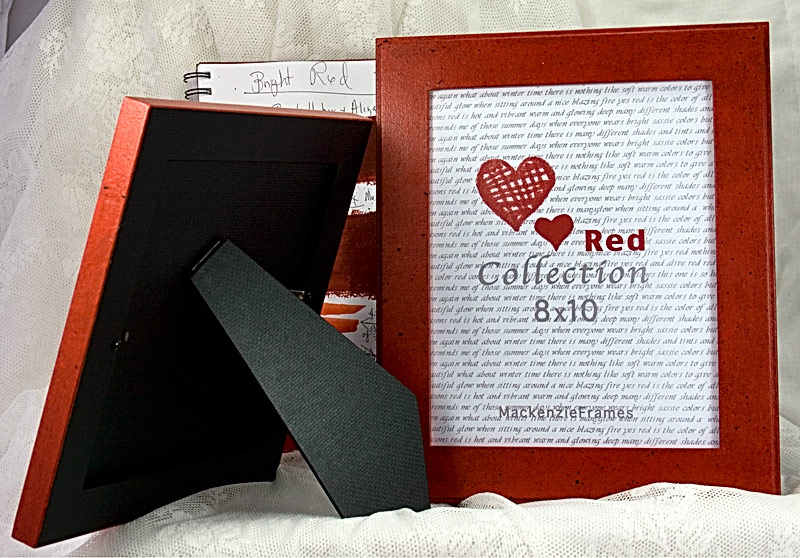
Deluxe Red Hand Painted Photo Frames Ready for Etsy

Well, just spent the afternoon photographing the Red Frames Hand-Made-By-Me. Why? You did that a few weeks ago! Well, since then, I have done a complete set of a deluxe Red Range of the hand painted frames that I am going to post in our Etsy Shop. These frames are all covered on the backs and struts with our textured black paper so they look just as good on the back as they do from the front, include glass and a neat paper insert, giving the frames a smart deluxe feel that makes them an ideal  gift for birthdays, weddings, anniversaries  or just a treat for yourself!

Here are a few of the photos that I will be posting on Etsy tomorrow:


Monday, June 6, 2011

Inspirational Decorative Wall Displays

I'm always on the lookout for inspiring wall displays - not hard to imagine why as I make so many frames! Here are a few ideas I have found on Pinterest - so be inspired!

Stairs of Distinction


Cool & Clean & White


A Wall of Monochrome


A Country Look


A Bit Over the Top - But What an Impact!


Friday, May 6, 2011

Red Frames Hand Made By Me!

Well this is RED WEEK on 'Details in the Decor' and I have just spent the afternoon preparing a whole bunch of photos that I took earlier this week of the Red Frames that I painted a couple of weeks ago. I just had to put a few up here to give you a sneak peak! More later...


Monday, April 11, 2011

DIY Shabby Chic White Frame For Wall Display Part 3


Adding a Little Extra - How did you get on with renovating your frame? Love to know, do leave a comment if you have time! Anyway, at the end of PART TWO I mentioned that I wanted to do a little more work on the other frame I was 'shabby chicing', so here we go if you want to follow along.

Next coat of paint - White I think - I've used a basic Liquitex artists acrylic that I first sponged lightly on the frame, and then applied a little more with a small (1/4 inch) flat brush to give a stippling effect which adds more texture on the flatter sections of the frame. This soon dries and is ready to have it's 'splatter' spots.  Mix a little of the first color that we used in Part Two, and with a dry hard brush, start splattering the paint onto the frame with your finger (practice a bit first on some paper). All you need to do now is add a little bees wax and buff to a soft sheen, or apply an acrylic mat varnish to give your finish some protection.  And there you have it - another shabby chic frame to add to your collection of empty frames to display on the wall!


Hope you have fun with your DIY Projects. If you REALLY haven't the time to DIY, but would still like to collect some Shabby Chic Frames, then I am selling these pieces in my new ARTFIRE STORE, so go have a look!


Friday, April 8, 2011

Romantic Style - My Lovely Prize Book!


I just had to take a little time here and tell you about a wonderful interior design book that I was lucky enough to win in the prize giveaway run by Mandy at her lovely blog à-la-parisienne  and also Debbie from powder-blue who donated the book.


What Luck!


It's called 'Romantic Style' and if like me, you love the 'Shabby Chic' look in all its forms, then put your hand in your purse and get out the plastic! This book is going to give you lots of ideas and inspiration for decorating your home.

Selina Lake and Sara Norman together with their photographer, Debi Treloar, have produced a well laid out book that illustrates the different aspects of romantic style decor, and I'll have to say that Debi Treloar's photos of the homes they have chosen, are truly inspiring.

I particularly like the mix of vintage finds with decoration which doesn't cost an arm and a leg that we can easily do ourselves. All you need are a few ideas of color matching, start hunting through garage or car boot sales for bits 'n bobs that the sellers might not want, but you can find just the right spot for, and it probably only needs a bit of a clean or perhaps a paint job to give it a new lease of life.

Well, this is just my slant on Romantic Style. I know for sure, as soon as you start leafing through you own copy, you will find lots of other ideas and inspirations that you can particularly relate to your own home decoration.

If you would like to buy the book, you can go to the publisher's website:


The price is: £19.99 or $29.95

Title: Romantic Style

Authors: Selina Lake & Sara Norrman

Photographer: Debi Treloar

ISBN No: 978-1-84975-040-0

Thursday, March 24, 2011

DIY Shabby Chic White Frame For Wall Display Part 2

Are You Ready For Part 2 of our tutorial? Part 1 is here if you missed it


First of all, give your frame a good dust down and lightly sand the surface. Now is a good time to get the vacume cleaner out and give the frame and your work surface a big clean-up so that when you start painting, everything is dust free.


Undercoat - Start with an undercoat - I am using a white one for wood. When it is dry, apply the first color coat :

First Color

I prefer an Acrylic (water based) Mat Emulsion that is used for decorating, it is easy to find a huge range of colors in your local DIY Store. The two colors I am using, are left over from decorating my bathroom last month, I had them mixed at the store after choosing from the extensive number of shade cards there. Just be sure that you buy a MAT emulsion - NOT satin or gloss. Using water based paints also has the added advantage of being quick drying and less smelly!

Put  a few spoonfuls of the first color on your plate, dip your brush in the water and stir the paint around - perhaps do this twice - in other words, we are diluting the paint a LITTLE, but not too much.

Brush the paint onto your prepared frame with light strokes and cover all the surface, pushing the paint into all the little nooks and crannies if your frame is very ornate. Don't worry if it looks a bit streaky, remember that this is the first coat.


Well, we are waiting for the paint to dry now! What are you going to do for the next couple of hours? Go shopping? Off to a Football Match? Work Out at the Gym (I prefer Yoga myself), or perhaps start preparing lunch or dinner - lots of food ideas in our 'DELICIOUS' section!


Second Color


OK - It's 2 hours later! Let's apply the second color - put some of your paint on the (clean) plate, diluted as before, by dipping your  (clean) brush in water a couple of times. Now, with your damp sponge (I buy a washing-up sponge and then cut it into 4 pieces), dip it into the diluted paint and very lightly tap the sponge onto your frame, highlighting the relief and the sides. Feel free here - don't be afraid, let your spontinaeity show through - we are doing the 'arty' bit now!

What next? Your efforts probably look a little 'thin' and transparent, mine needs more depth, so with a small paint brush, start to paint over some of the highlights to give more emphasis to the relief. Respond to your work, does it need a bit more sponging now? Mine does, so that is what I'm going to do, but every piece of work is different - JUST RELAX & ENJOY THE EXPERIENCE. If you make a mistake don't worry about it - you can always paint over and start again - but is it a mistake? Perhaps not, perhaps the 'mistake' is adding a new dimension to your work, so don't be in too much of a hurry to paint things out - think about it for a while!

Now, I I'm going to finish there with this frame, it is so ornate I don't think it needs anything else added paint wise and I love the 'stone' look that has evolved. SO - 'LET THE PAINT DRY'!


Hope you had a nice lunch, did you football team win? Had a good workout? I hope you left that computer alone!


Just to finish off - you need to put some protection on your work of art! There are two ways of doing this, either with a final coat of Transparent Mat Polyurethane Varnish, or a nice Bees Wax Polish gives a lovely soft sheen and feel that is well worth the effort of all the elbow grease that is needed in all the polishing.

On the other frame I am doing at the same time, I'm going to add a little extra before the varnish or polish, but I'll leave that for Part 3, so see you soon!

Tuesday, March 22, 2011

DIY Shabby Chic White Frame For Wall Display Part 1


I hate waste and I love a 'Shabby Chic' look, so I thought, let's put the two together and make something SPECIAL!

As you might know, Martin and I make picture and photo frames in our little studio here in SW France and over the years we seem to have accumulated a stockpile of redundant moulding, some of which is quite startlingly elaborate. Surely I can do something with this, so I hauled out a few pieces that were lurking in the back of the garage, gave them a good dust down and gathered a few materials together to give a new lease of life to these long forgotten beauties.*

Would you like to follow along and have a go yourself at the same time? Obviously we have an advantage here of lots of old moulding hanging around, but if you take a stroll down to your local car boot/garage sales (called 'brocante' here in France) this weekend, I am sure you will find a selection of old frames that are pleading with you to buy them and give them a makeover.

Are you up for it? OK, this is what you need:

1. Old frame
2. Vacume cleaner with little brush attachment.
3. Fine sandpaper (No.2)
4. Undercoat Paint. You will have to decide which type to use for the surface you are working on. I used one for wood.
5. Acrylic Mat Paint - I used the remains of the two colors I used for the bathroom I've just painted which as you will see are an 'Off White' and 'Stone' (color swatch below).
6. I did use a touch of Acrylic Artists Color (White) at the end for added enhancement, but this is not strickly necessary.
7. Bees Wax or Acrylic Mat Varnish.
8. Brushes + Old Plate + Water Jars + Old Knife + Wooden Blocks to put the frame on whilst working.
9. A packet of dish washing sponges.


*Yes, I know what you are thinking - The old stuff looks beautiful and I agree! We still make frames with this lovely moulding - you can see them here at our website - these are just odd bits that are too damaged for the real thing.

See you later for part 2.

Monday, December 27, 2010

Tea Cosies

I'm in desperate need of a new tea cosie, and have always been surprised at how difficult it is to find really nice ones. Harry and Anna,some friends of mine in London, said they saw some amazing tea cosies in the markets when on a trip to India - but taht is a long way away and seems like a rather expensive option just to buy a tea cosie! So, what are the alternatives? Well, I have been a member of the Etsy community for nearly two years now with our shop Mackenzie Frames, so I've had a little looksey in the cosy shops there and found some great cosies to suit all tastes.

This one  quite took my fancy, it reminded me of my visits to Texas many years ago! What do you think? 


                                             This tea cosie is made by Diane Tubb Designs


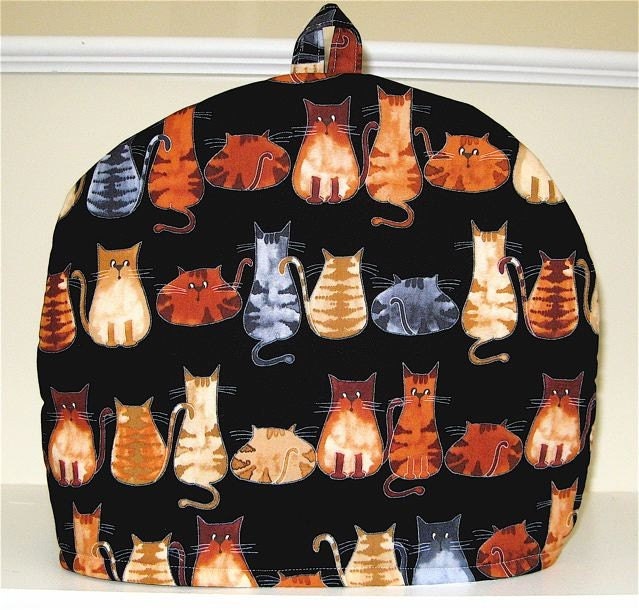
If you love cats, then you will love this one, so cute!


                                           The cosie is made by Britgal Designs again on Etsy

And now for something completely different. A plain and simple design and oh so elegant - yes - even tea cosies can be elegant!


                               Argle Street really does have some beautiful and practical designs

Monday, December 20, 2010

Related Posts Plugin for WordPress, Blogger...